Around Flatiron, there are those that skip the so-called “Avi videos” and those who pass around tips to make the most of them, with notes like “Watch them on youTube where you can slow the pace to 75%” — be forewarned that when you do this, Avi Flombaum sounds like he’s experiencing a high-pollen count spring day. You either bear through it, or learn to listen and code faster so you can return to 100% audio speed. “Definitely code along with them, it’ll up your coding game” says Tech Coach Brad near the end of a study group one evening. “I got this from Avi,” says another TC as he showed me the “cool kids” secret of using Option + up arrow to quickly pop to the top of the long list of RSpec and Capybara-laden reasons why your code is currently failing. If you watch closely, you can hear the names of current tech coaches and section leads, as Avi says things like “Great point, Cernan,” or “Exactly, Dakota.”
One video has a particularly mysterious ending. After creating files, no one can remember whether it’s Sinatra, Rails, or PORO, plain old Ruby objects, Avi saves the files not in the usual way, which would mean browsing to Github, creating a repo and following the third set of instructions to “push an existing repository from the command line.” Instead, he says, “Watch this, it’s amazing,” and proceeds to create a new repo from the command line AND then he git adds/commits/pushes the files. From the command line.
Every so often, Flatiron students will ask each other, “Hey, remember that? What was he doing?” Well, the other day I slacked out the question, to which the ever-awesome Tech Coach Seth messaged back the tell-all answer: He uses hub.
That’s the magic.
Here’s how to install hub and get it working so that you can create repos right from the command line.
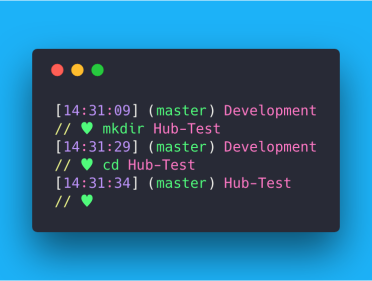
Make a new directory and cd into it.
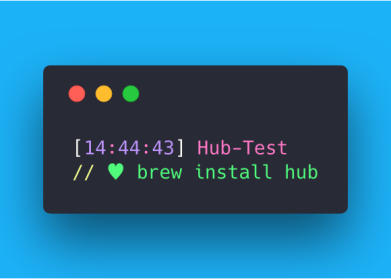
Use homebrew to install hub: brew install hub.
(If you don’t already have homebrew installed, here are the machine-specific directions).
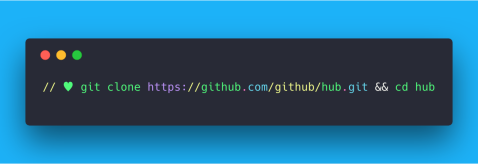
(Or you can install it from the source code on github: git clone https://github.com/github/hub.git && cd hub. More directions here, and it will look like this:
Once hub is installed, at the command line, type: alias git=hub.

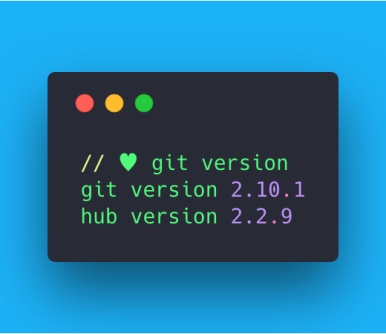
Check git version, to make sure both git and hub are set up. If they aren’t, go back and troubleshoot the installation.
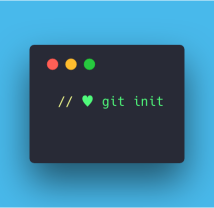
We’re ready to do what we’re used to: git init.
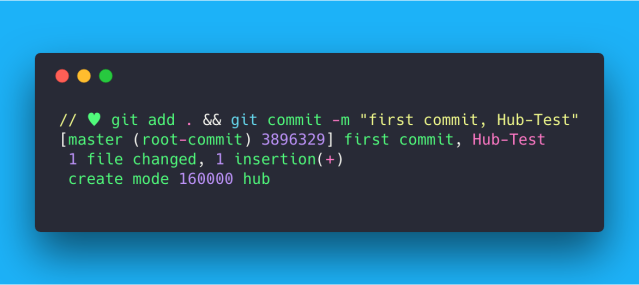
Then, git add and git commit:
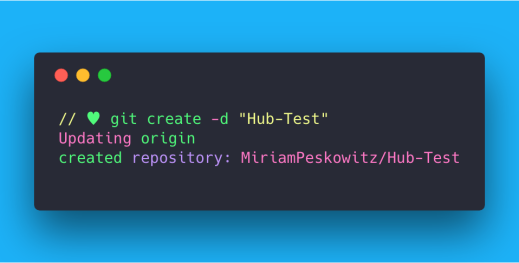
Here’s the special code magic, the create-repo command: git create -d “Your-File-Name”
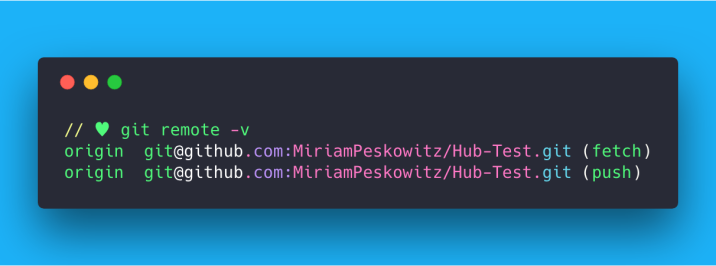
Use git remote -v, to check that the rep was created and to make sure your files are headed to the right place.
Check your git log and/or git status, as usual, and then: git push origin master, and follow any other directions that come up.
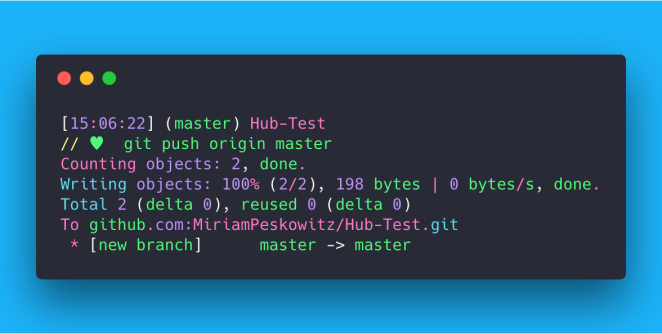
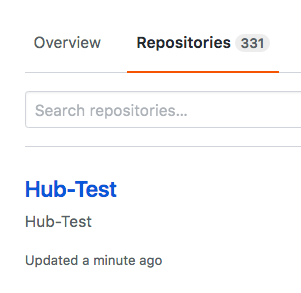
Now for the fun: check your repo.
- There may be some troubleshooting on the push, like setting git push –set-upstream origin master. If you’re trying this with a file name but no files, github may get slightly confused and direct you to the usual create-repo screen.
After the initial hub setup, when you’re ready to create the repo, use alias git=hub, add and commit, create -d “file name”, and push.
Q. How’d you get command line code to look like that?
A. Thanks to Seth Alexander for that link too: Carbon to show source code.